5/27/2026

Alpha-Gal Program Notes


Here is a list of SAAT practitioners in Misssouri and Arkansas. I am not recommending or promoting any of them, only offering the names of those I've found in searching on-line or seen mentioned on Facebook posts. 

Hold Chiropractic, Mtn View 

Dr Vance, Republic, MO 

Sprouting Wellness, Fayetteville 

The Farm Chiropractic, Bentonville 
 
Marsha Kaye, DACM, Bentonville 
 
Accupuncture certified by Dr Soliman SAAT protocol from Whitney Dwyer at Sprouting Wellness Clinic in Fayetteville. 479-312-0461 https://www.sproutingwellnessclinic.com/ 
 
Mindi Salvino, trained by Dr. Soliman. www.purehealthcollective.com .betterbloodhealth.com/about Www.Bentonvilleacupuncture.health  
 
N.A.E.T. trained doctors:
 
The information, below, isn’t original with me, it is what I found on-line and shared here for your information… Common Ingredients That May Be Mammal-Derived 
 
1. Polysorbate 80 (and 20) Used in foods, vaccines, and cosmetics Derived from oleic acid (plant or animal source) 
 
2. Glycerin / Glycerol Found in skincare, capsules, and foods Can be vegetable-based or animal-derived One of the most common hidden exposures 
 
 3. Magnesium Stearate / Stearic Acid Used in supplements and medications Often derived from animal fat Widely discussed in alpha-gal communities 
 
 4. Mono- and Diglycerides Common in baked goods and processed foods Source is rarely disclosed Can be plant or animal-based 
 
 5. Lecithin Typically soy or sunflower Occasionally derived from animal sources 
 
6. Oleic Acid Used in cosmetics and pharmaceuticals Same source issue as polysorbates 
 
7. Gelatin Found in capsules, desserts, and gummies Always animal-derived High-risk for alpha-gal sensitivity 
 
8. Lanolin Used in lotions and lip products Derived from sheep’s wool 
 
 9. Collagen Used in supplements and beauty products Derived from animal connective tissue 
 
10. Fatty Alcohols (Stearyl, Cetyl Alcohol) Used in cosmetics and personal care Can be plant-based or animal-derived  
 
Why This Matters At TickBiteData.com, many respondents report: persistent symptoms reactions not tied directly to food difficulty identifying triggers  
 
A Growing Data Gap Alpha-gal is currently classified as an allergy, but: many reported symptoms extend beyond classic allergic reactions environmental and ingredient-based exposures are not well studied labeling transparency is limited This is where real-world data becomes critical.  
 
What Can You Do? Look for “vegetable-derived” or “plant-based” labels\ Contact manufacturers when unclear Be mindful of: medications cosmetics processed foods  
 
Most importantly: Track your own reactions — patterns often reveal what labels don’t. Help Expand the Data If you have Alpha-gal syndrome, your experience matters. Have you reacted to products beyond food? Are symptoms continuing despite dietary change Take the survey and contribute to the research: www.tickbitedata.com Alpha-gal reactions are often: Delayed (hours after exposure) Inconsistent in severity Triggered by unexpected sources (medications, fillers, cross-contamination) Unpredictability condition, causes people to live on edge. 
 
Many individuals report: Multiple ER visits before diagnosis Severe financial burden from repeated emergency care Being sent home without answers Having to self-diagnose through elimination diets  
 
When the Hospital Isn’t a Safe Place One of the most alarming realities patients report: They are afraid to go to the hospital. Not because of the reaction—but because of what might be given to them while being treated. Animal-derived ingredients can be found in: Medications (gelatin capsules, magnesium stearate, etc.) IV solutions and additives Surgical materials Patients should:  
 
Carry documentation Advocate for themselves mid-reaction Educate healthcare providers in emergency settings  

 
Costs For many living with Alpha-gal, emergency preparedness isn’t just about awareness—it’s about affordability. Epinephrine auto-injectors (EpiPens), the very medication that can save a life during an anaphylactic reaction, often come with a steep out-of-pocket cost. Even with insurance, patients report: High copays Limited coverage Expired pens going unreplaced due to cost For those without strong insurance coverage, the price can be prohibitive—forcing some to carry expired injectors or go without one entirely. And access isn’t just financial Before even obtaining an EpiPen, many patients face: Multiple appointments trying to prove something is wrong Dismissal or misattribution of symptoms The burden of convincing a physician to prescribe a life-saving medication All while continuing to experience reactions. People are not only fighting a condition that can send them into anaphylaxis—they are also fighting: The cost of being prepared The time it takes to be believed The risk of not having access when it matters most  
 
Dining Out: A Constant Risk Calculation Restaurants and commercial kitchens are not designed to handle Alpha-gal safely. Even when staff is well-meaning, there are limitations: Shared grills and cooking surfaces Cross-contact through utensils and oils Hidden animal by-products in sauces, broths, and flavorings For someone with Alpha-gal, “I’ll just order something safe” isn’t simple. It becomes: Interrogating ingredients Assessing kitchen practices Deciding if the risk is worth it Or choosing not to eat at all.
 
 “It’s Just a Meat Allergy” — The Most Dangerous Misconception Reducing Alpha-gal to a “red meat allergy” minimizes the lived experience and the actual risk. This condition extends beyond: Beef, pork, lamb It can include: Medications Personal care products Food additives Environmental exposures And reactions aren’t always immediate or predictable—making it harder to identify and avoid triggers. The Mental Toll No One Talks About Living with Alpha-gal often means: Hypervigilance Social isolation Food anxiety Medical distrust And above all: A constant question in the back of your mind— “Is this going to be the thing that sends me to the hospital?”
 
Bottom line is, there ARE treatments, discussion groups, others who understand what you’re experiencing and can help. Some foods to avoid: Flavorings, soure cream and onion, bacon-flavored, cheddar cheese flavors very oten contain animal-derived ingredients. Look out for whey, casein, buttermilk, lard or "natural flavors" in foods. If alleric to soy, read the label of cereals, breads, cakes and similar products. Also, pickles, catsup, canned goods. It is important to read the label!  
 
Facebook groups that are helpful, where you can ask questions, find support, recipes and lists of safe restaurants in your area. 
 
Alpha-Gal Eats in the Ozarks  (Facebook) 
SAAT  (Facebook) 
Traveling with Alpha-Gal  (Facebook) 
The Alpha-Gal Kitchen (Facebook) 
 
 Preventing tick bites: DEET and Off aren't reliably effective in keeping ticks off. 
 
The current recommendation is using Permethrin. It is meant to be sprayed on the clothing you wear outside (read the instructions on the bottle). Always wear the same clothing when you are outdoors. Permethrin, once sprayed on clothing, will last through 4 or 5 washings in the laundry. Bathe and inspect for ticks after working outside. It's recommended you use reversed duct tape around your ankles which can prevent ticks from climbing upwards on your body. Always remove ticks as soon as discovered, wash the area with soap and water and apply some Polysorbin or Triple-Antibiotic to the bite area. If you squash a tick with your fingernails, wash with soap and water immediately afterward. And never, ever, bite a tick with your teeth! It's an old custom in some areas and you can catch Alpha-Gal that way!!!
 
Permethrin in a pump spray, which is the most economical, is available from Amazon. It's also available in the sports section in an aerosole can at Walmart. 

5/21/2026

Alpha-Gal Program Notes

Here is a list of SAAT practitioners in Misssouri and Arkansas. I am not recommending or promoting any of them, only offering the names of those I've found in searching on-line or seen mentioned on Facebook posts. 

Hold Chiropractic, Mtn View 

Dr Vance, Republic, MO 

Sprouting Wellness, Fayetteville 

The Farm Chiropractic, Bentonville 
 
Marsha Kaye, DACM, Bentonville 
 
Accupuncture certified by Dr Soliman SAAT protocol from Whitney Dwyer at Sprouting Wellness Clinic in Fayetteville. 479-312-0461 https://www.sproutingwellnessclinic.com/ 
 
Mindi Salvino, trained by Dr. Soliman. www.purehealthcollective.com .betterbloodhealth.com/about Www.Bentonvilleacupuncture.health  
 
The information, below, isn’t original with me, it is what I found on-line and shared here for your information… Common Ingredients That May Be Mammal-Derived 
 
1. Polysorbate 80 (and 20) Used in foods, vaccines, and cosmetics Derived from oleic acid (plant or animal source) 
 
2. Glycerin / Glycerol Found in skincare, capsules, and foods Can be vegetable-based or animal-derived One of the most common hidden exposures 
 
 3. Magnesium Stearate / Stearic Acid Used in supplements and medications Often derived from animal fat Widely discussed in alpha-gal communities 
 
 4. Mono- and Diglycerides Common in baked goods and processed foods Source is rarely disclosed Can be plant or animal-based 
 
 5. Lecithin Typically soy or sunflower Occasionally derived from animal sources 
 
6. Oleic Acid Used in cosmetics and pharmaceuticals Same source issue as polysorbates 
 
7. Gelatin Found in capsules, desserts, and gummies Always animal-derived High-risk for alpha-gal sensitivity 
 
8. Lanolin Used in lotions and lip products Derived from sheep’s wool 
 
 9. Collagen Used in supplements and beauty products Derived from animal connective tissue 
 
10. Fatty Alcohols (Stearyl, Cetyl Alcohol) Used in cosmetics and personal care Can be plant-based or animal-derived  
 
Why This Matters At TickBiteData.com, many respondents report: persistent symptoms reactions not tied directly to food difficulty identifying triggers  
 
A Growing Data Gap Alpha-gal is currently classified as an allergy, but: many reported symptoms extend beyond classic allergic reactions environmental and ingredient-based exposures are not well studied labeling transparency is limited This is where real-world data becomes critical.  
 
What Can You Do? Look for “vegetable-derived” or “plant-based” labels\ Contact manufacturers when unclear Be mindful of: medications cosmetics processed foods  
 
Most importantly: Track your own reactions — patterns often reveal what labels don’t. Help Expand the Data If you have Alpha-gal syndrome, your experience matters. Have you reacted to products beyond food? Are symptoms continuing despite dietary change Take the survey and contribute to the research: www.tickbitedata.com Alpha-gal reactions are often: Delayed (hours after exposure) Inconsistent in severity Triggered by unexpected sources (medications, fillers, cross-contamination) Unpredictability condition, causes people to live on edge. 
 
Many individuals report: Multiple ER visits before diagnosis Severe financial burden from repeated emergency care Being sent home without answers Having to self-diagnose through elimination diets  
 
When the Hospital Isn’t a Safe Place One of the most alarming realities patients report: They are afraid to go to the hospital. Not because of the reaction—but because of what might be given to them while being treated. Animal-derived ingredients can be found in: Medications (gelatin capsules, magnesium stearate, etc.) IV solutions and additives Surgical materials Patients should:  
 
Carry documentation Advocate for themselves mid-reaction Educate healthcare providers in emergency settings  
 
Costs For many living with Alpha-gal, emergency preparedness isn’t just about awareness—it’s about affordability. Epinephrine auto-injectors (EpiPens), the very medication that can save a life during an anaphylactic reaction, often come with a steep out-of-pocket cost. Even with insurance, patients report: High copays Limited coverage Expired pens going unreplaced due to cost For those without strong insurance coverage, the price can be prohibitive—forcing some to carry expired injectors or go without one entirely. And access isn’t just financial Before even obtaining an EpiPen, many patients face: Multiple appointments trying to prove something is wrong Dismissal or misattribution of symptoms The burden of convincing a physician to prescribe a life-saving medication All while continuing to experience reactions. People are not only fighting a condition that can send them into anaphylaxis—they are also fighting: The cost of being prepared The time it takes to be believed The risk of not having access when it matters most  
 
Dining Out: A Constant Risk Calculation Restaurants and commercial kitchens are not designed to handle Alpha-gal safely. Even when staff is well-meaning, there are limitations: Shared grills and cooking surfaces Cross-contact through utensils and oils Hidden animal by-products in sauces, broths, and flavorings For someone with Alpha-gal, “I’ll just order something safe” isn’t simple. It becomes: Interrogating ingredients Assessing kitchen practices Deciding if the risk is worth it Or choosing not to eat at all.
 
 “It’s Just a Meat Allergy” — The Most Dangerous Misconception Reducing Alpha-gal to a “red meat allergy” minimizes the lived experience and the actual risk. This condition extends beyond: Beef, pork, lamb It can include: Medications Personal care products Food additives Environmental exposures And reactions aren’t always immediate or predictable—making it harder to identify and avoid triggers. The Mental Toll No One Talks About Living with Alpha-gal often means: Hypervigilance Social isolation Food anxiety Medical distrust And above all: A constant question in the back of your mind— “Is this going to be the thing that sends me to the hospital?”
 
Bottom line is, there ARE treatments, discussion groups, others who understand what you’re experiencing and can help. Some foods to avoid: Flavorings, soure cream and onion, bacon-flavored, cheddar cheese flavors very oten contain animal-derived ingredients. Look out for whey, casein, buttermilk, lard or "natural flavors" in foods. If alleric to soy, read the label of cereals, breads, cakes and similar products. Also, pickles, catsup, canned goods. It is important to read the label!  
 
Facebook groups that are helpful, where you can ask questions, find support, recipes and lists of safe restaurants in your area. 
 
Alpha-Gal Eats in the Ozarks SAAT 
 
 Preventing tick bites: DEET and Off aren't reliably effective in keeping ticks off. 
 
The current recommendation is using Permethrin. It is meant to be sprayed on the clothing you wear outside (read the instructions on the bottle). Always wear the same clothing when you are outdoors. Permethrin, once sprayed on clothing, will last through 4 or 5 washings in the laundry. Bathe and inspect for ticks after working outside. It's recommended you use reversed duct tape around your ankles which can prevent ticks from climbing upwards on your body. Always remove ticks as soon as discovered, wash the area with soap and water and apply some Polysorbin or Triple-Antibiotic to the bite area. If you squash a tick with your fingernails, wash with soap and water immediately afterward. And never, ever, bite a tick with your teeth! It's an old custom in some areas and you can catch Alpha-Gal that way!!!
 
Permethrin in a pump spray, which is the most ecconomical, is available from Amazon. It's also available in the sports section in an aerosole can at Walmart. 


10/29/2024

Banana Cheesecake

This tastes like banana pudding, but in cheesecake! 1 1/2 cups finely crushed vanilla wafers 1/2 cup chopped pecans 1/4 cup butter, melted 2 diced ripe bananas 2 Tbsps. lemon juice 2 Tbsps. light brown sugar 24 oz. cream cheese, softened 1 cup granulated sugar 3 eggs 2 tsp. vanilla extract Preheat oven to 350°F. Stir together finely crushed vanilla wafers, pecans, and melted butter in a small bowl until well blended. Grease and flour a 9-inch springform pan and press mixture onto bottom of pan. Bake 10 minutes. Cool completely on a wire rack. Combine lemon juice and bananas in a small saucepan. Stir in brown sugar. Cook over medium-high heat, stirring constantly, 1 minute or until sugar has dissolved. Using an electric mixer, beat cream cheese at medium speed for 3 minutes or until smooth. Gradually add granulated sugar, beating until blended. Add eggs. Beat until yellow disappears. Beat in vanilla, and gently stir banana mixture into cream cheese mixture. Pour batter into crust. Bake at 350°F for 45 to 55 minutes or until center is almost set. Remove cheesecake from oven; gently run a knife around edge of cheesecake to loosen. Cool completely on a wire rack Cover and chill for 8 hours. Garnish with whipped cream
.

10/01/2024

Fig Upside Down Cake

This was inspired by Robbins Haii's cake, from Bear Creek Farm. I didn't have ground cardamom, so made a couple substitues. This is a delicious cake! 5-6 Fresh Figs sliced in half crosswise 1/2 cup sugar 1/4 cup water 1 cup flour 1 tsp baking powder 1/2 tsp salt 1 tsp ground cardamom (I substitute 1/8 tsp each of ground coriander, allspice and cinnamon) 4 tbsp butter 3/4 cup brown sugar 2 eggs 1 tsp vanilla extract 3/4 cup sour cream 1/2 tsp. salt Preheat the oven to 350 degrees. Grease an 8 inch pan with butter. Place a parchment paper circle on the bottom, grease that as well. (I used a springform pan, but any baking pan will do)
 Slice the figs and arrange them on the bottom of the pan (make sure to place the better looking side to face towards the bottom and avoid using end pieces of the figs — eat it as a snack). 
 In a small pot over medium heat, add the sugar and water. DO NOT STIR. Leave the mixture untouched until it turns lightly golden brown, about 10-12 minutes. Keep a close eye on the last few minutes. Immediately remove from heat and pour over the figs. 
 In a medium bowl combine the flour, baking powder, salt and spices. 
 In a stand mixer beat together butter and brown sugar until well incorporated, about 2-3 minutes. One at a time, add the eggs mixing in between each addition. Add in the vanilla extract and sour cream, mix well. In two batches add the dry ingredients and mix until just incorporated. 
 Pour the cake batter over the figs in the pan and place into the oven for 30-35 minutes, or until a skewer comes out clean. Allow the cake to set for 5 minutes. 
 Run a knife along the edge of the cake if needed. Place a large plate over the top of the cake and then gently flip over and lift off pan. Serve with whipped cream.

6/12/2024

Jim Long's Lemon Balm Cake

Jim Long's Lemon Balm Cake Ozarks Gardening/Syndicated Newspapers via Ozarks Mountaineer Magazine, copyright Jim Long 2022 Lemon Balm has a fresh, pleasant lemony fragrance that combines well in lots of dessert recipes. Our garden intern who was here through the month of May decided to learn pie baking. One of the challenges I gave him was to create an herbal pie. He chose to make a chess pie in which he included lemon balm, lemongrass and lemon thyme. It was outstanding and definitely, “a keeper.” Lemon balm combines well with other herbs in tea blends. I make a festive tea often when we have groups touring the garden. To make it, I heat about 6 cups of water and when almost boiling, add a good handful of lemon balm, some cut up lemongrass leaves two thinly sliced lemons and one thinly sliced orange, and a couple of quart-sized Luzianne tea bags, along with a tablespoon of chamomile flowers (fresh or dried). I turn off the heat and put a lid on the pan, letting the herbs and tea steep until cooled, then strain them out. I add another thinly sliced lemon and orange, squeezing both a bit. Then I add a quart of cranberry-raspberry juice and another 6 cups of water, chill it all for a few hours then serve over ice. Even people who think they don’t like “herbal” tea, like this one. Lemon balm, like most herbs, has a vastly better flavor if you keep cutting it back. All basils and lemon balm lose flavor if they aren’t pruned every couple of weeks. Basil gets bitter while lemon balm gets, “soapy” tasting if not pruned. I cut my lemon balm back often during the year and harvest the newest growth for the best flavor. I sometimes dry lemon balm for winter use but I prefer it fresh whenever possible. Lemon balm is a reliably hardy perennial that will grow most anywhere with sunshine. It will even take half shade and still produce well. If you let it go to seed it will scatter the seed into other beds, not a lot, not to the amount that garlic chives do, and it’s not hard to keep it in the place you planted it. Even though it is in the larger family of plants that include the mints, it doesn’t spread rapidly from underground runners, either. You can divide the plant easily by cutting it in two and replanting the half you’ve dug up. I have posted several of my lemon balm cake recipes over the years and you can find some of the variations on my website www.Longcreekherbs.com under, “Jim’s Recipes.” All of the variations for the cake include lemon thyme, lemon balm and lemongrass, all of which are easy to grow in the garden. The University of Maryland Medical Center’s website (www.umm.edu) says this about lemon balm: “Several studies have found that lemon balm combined with other calming herbs (such as valerian, hops, chamomile) helps reduce anxiety and promote sleep.” They go on to say this herb was regularly used back to the Middle Ages and before, to reduce stress and anxiety, promote sleep and improve appetite. It was also used to ease the pain and discomfort of upset stomach, flatulence and bloating. Lemon balm is native to Europe but is grown around the world. Commercially it’s grown for medicine, cosmetics and furniture polish manufacturing and recent double-blind studies where the control group used a placebo and the test group took a combination of lemon balm and Valerian (another herb), the lemon balm-Valerian combination proved to increase mood and “significantly increased calmness and alertness.” Other studies suggest that topical ointments containing lemon balm seem to help heal lip sores from herpes simplex virus, as well as helping heal small scratches and minor wounds. Lemon balm is a delightful and useful plant and if you’re not growing it, you’re missing out on its many benefits. Plus, it just tastes good in cakes, cookies and now, thanks to our intern, in pie, as well! Here's my favorite Lemon Balm Cake recipe. I first served it at my (formerly) Herb Day in May back in the 1990s. 3/4 cup milk 2 eggs 1 cup sugar 1 Tablespoon fresh lemon peel zest 2 cups flour 1 1/2 teaspoon baking powder 1/4 teaspoon salt 6 Tablespoons butter, softened 1/4 cup coarsely-chopped fresh lemon balm leaves *1 Tablspoon finely snipped lemon grass (fresh or dried) 1 teaspoon lemon thyme leaves, stems removed Heat oven to 350 degrees F. Scald milk. Put hot milk and the 3 lemony herbs in food processor or blender. Process well and set aside to steep Combine flour, baking powder and salt, mixing then add eggs, sugar, butter and lemon zest. Add the steeped herbs/milk and blend well until dough is mixed. Pour into a greased bread pan (9 x 5 inch) and bake about 50 minutes. Test with a toothpick or knife, if tester comes out with batter still on, give it a few more minutes of baking. Topping: Juice of 1 lemon, combined with enough powdered sugar to make a thick syrup. Poke a few holes in the still-warm cake and pour the syrup over. Repeat pouring the syrup until all of it used up. Let the cake rest for an hour or so, or overnight before serving. This cake also freezes well and can be kept for a month or more frozen. *Note about lemon grass. I often use the leaves and/or the "bulb". When using the leaves make sure to snip them very fine with scissors rather than chopping. Even though you will be blending them in the hot milk, the leaves won't blend up enough unless snipped very fine.

10/29/2023

Green Tomato Pie

2 cups sliced green tomatoes 1 1/2 cups sugar 5 tablespoons flour 1/4 teaspoon salt 1 tablespoon apple cider vinegar 1 teaspoon ground cinnamon Dough for a double pie crust Preheat oven to 350 degrees F Combine ingredients in bowl, toss to make sure sugar and flour are mixed well with the tomatoes. Pour the mixture into the bottom pie crust, top with bits of butter and seal on the top crust, cutting a vent in the top. Bake for about one hour or until crust is nicely browned. Cool and serve.

7/19/2023

Spanish Gazpacho

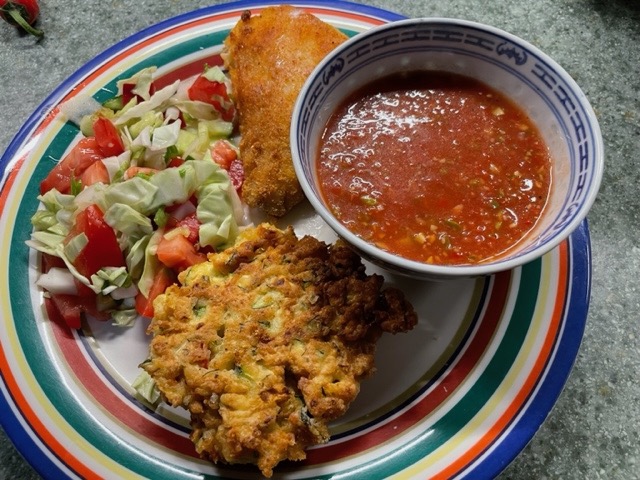
Gazpacho, a much-loved cold summer soup. We have it for lunch or supper, with sandwiches or zucchini fritters, with sweet corn from the garden or just with chips like salsa. It's a great way to use excess produce from the garden (or from your CSA). It takes only minutes to fix, can be kept in the fridge for 3 or 4 days, although it's unlikely to last that long because it is such a refreshing treat on a hot day.
Ingredients: 1 1/2 pounds ripe tomatoes, no need to peel or seed About 2 cups tomato juice, or I like 1 cup juice and 1 cup of Zing-Zang bloody mary mix 2 medium cucumbers, cut in chunks Half a red bell pepper, cut in large pieces Half a medium onion, cubed, or 3 green onions 1 small jalapeno, seeds removed 1 garlic clove 1/4 cup extra-virgin olive oil 1 lime, juiced 2 teaspoons balsamic vinegar 2 teaspoons Worcestershire sauce 1/2 teaspoon toasted, ground cumin 1 teaspoon kosher salt 1/4 teaspoon freshly ground black pepper Chopped cilatro for garnish Place everything in a food processor in batches and chop fine, leave some tiny chunks for texture. Chill at least 2 hours or overnight. Serve with a dollop of sour cream or plain yogurt, if desired, and some chopped cilantro on top.

7/04/2023

Cold Cucumber Soup for Summer

Cold Cucumber Soup I learned this recipe from the late Billy Joe Tatum many years ago. I've made cucumber soup half my lifetime but Billy Joe's method completely changed my method. Ingredients 3 or 4 medium to large cucumbers Half of one average-sized onion, sliced 3 tablespoons butter 3/4 cup plain yogurt 1 1/2 cups buttermilk 3 cups chicken broth Fresh dill Salt to taste Start with 3 or 4 medium to large cucumbers. Peel if the skin is bitter, otherwise peel or don't peel. Remove the seeds if they are large. Slice cucumbers and set half aside. In a skillet, melt about 3 tablespoons butter, then add in HALF of the sliced cucumbers and the onions. Simmer about 5 to 7 minutes. Add approximately 2 cups chicken broth (canned or fresh, whatever you have on hand). Continue simmering for another 5 to 8 minutes, just until the onion is nearly transparent. Working in batches, put the simmered cucumber and onion in a blender with another 1 cup chicken broth and the remaining fresh cucumber slices. Add the fresh dill, yogurt and buttermilk and blend well. Chill several hours or overnight before serving. Add a dollop of yogurt or sour cream and some diced cucumber and dill as garnish on top.

8/10/2022

Jim Long's Lemon Balm Cake

Ozarks Gardening/Syndicated Newspapers via Ozarks Mountaineer Magazine, copyright Jim Long 2022

Lemon Balm has a fresh, pleasant lemony fragrance that combines well in lots of dessert recipes. Our garden intern who was here through the month of May decided to learn pie baking. One of the challenges I gave him was to create an herbal pie. He chose to make a chess pie in which he included lemon balm, lemongrass and lemon thyme. It was outstanding and definitely, “a keeper.” 

Lemon balm combines well with other herbs in tea blends. I make a festive tea often when we have groups touring the garden. To make it, I heat about 6 cups of water and when almost boiling, add a good handful of lemon balm, some cut up lemongrass leaves two thinly sliced lemons and one thinly sliced orange, and a couple of quart-sized Luzianne tea bags, along with a tablespoon of chamomile flowers (fresh or dried). I turn off the heat and put a lid on the pan, letting the herbs and tea steep until cooled, then strain them out. I add another thinly sliced lemon and orange, squeezing both a bit. Then I add a quart of cranberry-raspberry juice and another 6 cups of water, chill it all for a few hours then serve over ice. Even people who think they don’t like “herbal” tea, like this one. 

Lemon balm, like most herbs, has a vastly better flavor if you keep cutting it back. All basils and lemon balm lose flavor if they aren’t pruned every couple of weeks. Basil gets bitter while lemon balm gets, “soapy” tasting if not pruned. I cut my lemon balm back often during the year and harvest the newest growth for the best flavor. I sometimes dry lemon balm for winter use but I prefer it fresh whenever possible. Lemon balm is a reliably hardy perennial that will grow most anywhere with sunshine. It will even take half shade and still produce well. If you let it go to seed it will scatter the seed into other beds, not a lot, not to the amount that garlic chives do, and it’s not hard to keep it in the place you planted it. 

Even though it is in the larger family of plants that include the mints, it doesn’t spread rapidly from underground runners, either. You can divide the plant easily by cutting it in two and replanting the half you’ve dug up. I have posted several of my lemon balm cake recipes over the years and you can find some of the variations on my website www.Longcreekherbs.com under, “Jim’s Recipes.” All of the variations for the cake include lemon thyme, lemon balm and lemongrass, all of which are easy to grow in the garden. 

The University of Maryland Medical Center’s website (www.umm.edu) says this about lemon balm: “Several studies have found that lemon balm combined with other calming herbs (such as valerian, hops, chamomile) helps reduce anxiety and promote sleep.” They go on to say this herb was regularly used back to the Middle Ages and before, to reduce stress and anxiety, promote sleep and improve appetite. It was also used to ease the pain and discomfort of upset stomach, flatulence and bloating. Lemon balm is native to Europe but is grown around the world. Commercially it’s grown for medicine, cosmetics and furniture polish manufacturing and recent double-blind studies where the control group used a placebo and the test group took a combination of lemon balm and Valerian (another herb), the lemon balm-Valerian combination proved to increase mood and “significantly increased calmness and alertness.” Other studies suggest that topical ointments containing lemon balm seem to help heal lip sores from herpes simplex virus, as well as helping heal small scratches and minor wounds.

Lemon balm is a delightful and useful plant and if you’re not growing it, you’re missing out on its many benefits. Plus, it just tastes good in cakes, cookies and now, thanks to our intern, in pie, as well! 

Here's my favorite Lemon Balm Cake recipe. I first served it at my (formerly) Herb Day in May back in the 1990s. 

 3/4 cup milk 

2 eggs 

1 cup sugar 

1 Tablespoon fresh lemon peel zest 

2 cups flour 

1 1/2 teaspoon baking powder 

1/4 teaspoon salt 

6 Tablespoons butter, softened 

1/4 cup coarsely-chopped fresh lemon balm leaves 

*1 Tablspoon finely snipped lemon grass (fresh or dried)

1 teaspoon lemon thyme leaves, stems removed 

Heat oven to 350 degrees F. 

Scald milk. Put hot milk and the 3 lemony herbs in food processor or blender. Process well and set aside to steep 

Combine flour, baking powder and salt, mixing then add eggs, sugar, butter and lemon zest. Add the steeped herbs/milk and blend well until dough is mixed. 

Pour into a greased bread pan (9 x 5 inch) and bake about 50 minutes. 

Test with a toothpick or knife, if tester comes out with batter still on, give it a few more minutes of baking.  

Topping: 

Juice of 1 lemon, combined with enough powdered sugar to make a thick syrup. 

Poke a few holes in the still-warm cake and pour the syrup over. Repeat pouring the syrup until all of it used up. Let the cake rest for an hour or so, or overnight before serving. This cake also freezes well and can be kept for a month or more frozen. 

*Note about lemon grass. I often use the leaves and/or the "bulb". When using the leaves make sure to snip them very fine with scissors rather than chopping. Even though you will be blending them in the hot milk, the leaves won't blend up enough unless snipped very fine.

You can fine lots more of my recipe in my books at https://www.longcreekherbs.com/product-category/books/

7/21/2020

Cold Cucumber Soup

I learned this recipe from the late Billy Joe Tatum many years ago. I've made cucumber soup half my lifetime but Billy Joe's method completely changed my method.


Ingredients
 3 or 4 medium to large cucumbers
Half of one average-sized onion, sliced
3 tablespoons butter
3/4 cup plain yogurt
1 1/2 cups buttermilk
3 cups chicken broth
Fresh dill
Salt to taste

Start with 3 or 4 medium to large cucumbers. Peel if the skin is bitter, otherwise peel or don't peel. Remove the seeds if they are large. Slice cucumbers and set half aside.

In a skillet, melt about 3 tablespoons butter, then add in HALF of the sliced cucumbers and the onions. Simmer about 5 to 7 minutes.

Add approximately 2 cups chicken broth (canned or fresh, whatever you have on hand).

Continue simmering for another 5 to 8 minutes, just until the onion is nearly transparent.

Working in batches, put the simmered cucumber and onion in a blender with another 1 cup chicken broth and the remaining fresh cucumber slices.
Add the fresh dill, yogurt and buttermilk and blend well.

Chill several hours or overnight before serving. Add a dollop of yogurt or sour cream and some diced cucumber and dill as garnish on top.

Our pup Eli says you'll love it.

Mint, More Useful Than You Thought

When most people think of mint they likely think of mint-chocolate ice cream. Or dried mint leaves for tea. But hey, mint is way more useful than that. Consider Cold-Pressed Mint Tea. You'll find the recipe in several of my books on my website.

If you sort of, kind of like mint tea made from dried mint leaves or those disgusting mint teabags (which are leaves with mint flavoring added), you'll love this upscale, fresh version.

First, start off with a handful of fresh mint. Any kind of mint, peppermint, spearmint, apple mint, whatever you have. And don't obsess over what a handful is, just harvest a bunch. Double it over, then give it a slight twist like you were wringing out a dish cloth.

The goal is to crush it a bit to release the essential oils in the leaves and stems. And yes, use leaves, stems and flowers if the mint is in bloom. The whole plant has flavor.


Next, put the handful of mint in the bottom of a pitcher, this one probably holds 3 or 4 quarts, I just grabbed the first pitcher I saw in the pantry.

With the mint in the bottom of the pitcher, next, fill the pitcher all the way up to the top with ice. Don't skimp, the pitcher needs to be full of ice all the way to the top, with the mint on the bottom.


Now, with mint and ice in place, add water all the way to the top of the pitcher. Give it 5 minutes to steep and it is ready to drink. It's almost like instant tea - only way better. Pour yourself a glass of the freshest, best tasting mint tea you have ever had.


Variations: 
1 - Add several fresh or frozen strawberries.
2 - Add several slices of cucumber in the bottom with the mint.
3 - How about slightly crushed watermelon...
4 - Fresh raspberries added is another great flavor.


Bottom line, this is a no-calorie, refreshing summer beverage.

And if you are really adventurous, the next time you are hot and sweaty from working outdoors, pour some of this refreshing tea into a wash cloth and soothe your hot face and skin. You will be amazed at how much better this makes your skin feel.


12/05/2013

Make a Cooking Wreath from Herbs

Copyright©Jim Long 2013

Herbs and pruners are all you need to make a wreath.

I wrote about this craft thing I used to do with groups of visitors, back in the 1990s for The Herb Companion magazine. Seems like a lot of herb groups around the country liked the idea and made lots to sell, so I'm reprinting it again here. It's pretty simple, a wreath woven together out of cooking herbs. I used to sell them in little cellophane bags with a couple of recipes attached. To use the wreath, you simply started a pot of soup or stew boiling and about 15 minutes before the end of the cooking, you simply drop the entire wreath into the pot for seasoning. The flavor is delicious!
Step 1
Step 1, pick a long sprig of rosemary. New, this year's growth is best simply because heavier wood is more likely to break than to bend. You can use any of the following to work into your wreath, all with good flavor: Rosemary, Thyme (any variety), Sage, Garlic chives, Chives (leaves and/or flowers), Oregano, Basil, Lavender (flower spikes), Hyssop, Parsley and Lemongrass (even if it's already brown it still have flavor).
Step 2, bending the sprigs to weave.
To begin your wreath, choose a nice, long sprig of hyssop or rosemary and bend it into a circle, twisting the ends around each other. Hold in place with your thumb and forefinger while you wrap another sprig of a different herb in the other direction (or tie the ends together temporarily with plain white string).

You want to weave each sprig in the opposite direction of the first so they hold each other in place. Don’t get discouraged, it gets easier as you work. (You may want to make several on your first try to get the hang of it).

Step 2, Weave each of the herbs into your wreath, using only the stems and leaves, no string. Tuck ends under and over an earlier sprig and keep adding more. You want to end up with a wreath that is about four inches across, or smaller. Use lemongrass or garlic chives as the last herb, wrapping  it around like a ribbon and tucking each end under another sprig to hold it in place.
Step 3, finishing.
Step 3, When your wreath is finished, trim off any extra ends that are sticking out and put the wreathes in a dark place, like a pantry, on paper and let them dry until crisp.
Attach a string and a recipe if you wish and your cooking wreath is ready to give to a friend.

To use the wreath, remove the string and drop into an already boiling pot of soup or stew. It’s best to add the wreath during the last fifteen or twenty minutes of cooking (this is true of adding any herbs, fresh or dried; add them too soon and the cooking removes the flavors, so add herbs in the last minutes of cooking for the best flavor).
2 finished wreathes; attach a recipe to give as a gift.

Recipes to choose from for attaching to the wreath:

Autumn Herb Wreath Chicken Soup

2 1/2 quarts water
2 chicken breasts
1 stalk celery, diced
1/2 cup diced onion
2 carrots, peeled, sliced
The entire cooking wreath
1/4 teaspoon turmeric
Dash salt and pepper, to taste
*Optional: 1/4 cup brown rice, rinsed

Bring water to a boil and add the chicken and vegetables. Cook until the chicken is tender, about 20 minutes, remove chicken and dice, then add back to the soup. Add the optional rice and reduce heat to a simmer, cooking 10-15 minutes. When you add the rice/pasta, also remove the ribbon from the cooking wreath and add the wreath to the pot of simmering soup. Simmer until rice is done, remove wreath and serve.

Vegetarian Herb Wreath Soup

A vegetarian friend would receive this recipe card attach to their cooking wreath:
2 1/2 quarts water or vegetable broth
Bring water to a boil and add an assortment of your favorite diced vegetables: celery, potato, carrots, a turnip, some cabbage, onion, garlic, 1 slice ginger, etc. about 3 cups total.
*Optional 1/4 cup brown rice, rinsed

Simmer vegetables and rice until tender, about 15-18 minutes. Add the cooking wreath (with the ribbon removed) after 10 minutes of cooking, and continue cooking until rice is tender. Remove the wreath and serve.

Three little cooking wreathes, before ribbons and recipes.

11/20/2013

Kale, a Healthy Addition to Meals


Three kale varieties in the Bear Creek Farm gardens.
Kale is a very healthful greens plant with lots of benefits. It has taken me a good while to actually like kale, but over time I've come to really enjoy this leafy plant. I've been experimenting with new ways to use kale, and my recipe for kale stuffing and kale and pear salad are listed below. We had both last night for supper and I have to admit, both were darned good!

Here's what I served for supper last evening. It's flounder baked with kale and cornbread stuffing. Next to that on the plate is a kale and pear salad.
Flounder baked with kale and cornbread stuffing.
Start with 1/2 cup chopped celery and 1/4 cup chopped onion. I added 1/8 cup of zucchini squash and sauted all of that in 2 tablespoons of olive oil. After about 7 minutes and while still cooking, I added 1 1/2 cups chopped, fresh kale and let that wilt. I added 2 cups of cornbread cubes, some poultry seasoning (sage and thyme) and simmered that until the cornbread cubes had absorbed the liquid. I piled it atop the founder and baked it for 15 minutes at 350 degrees F.

Kale Salad
The kale salad was just as healthy and also quite easy. I used 2 cups of coarsely chopped kale (any variety, all kale is good). I added one fresh pear, cut in pieces, 1/4 cup seedless grapes cut in half, 2 tablespoons toasted sunflower seeds (or raw, both will work fine). The dressing was simply 3 tablespoons of yogurt - I had blackberry yogurt on hand, but any favorite yogurt works. The flavors were great, we had a healthy, filling meal and I'll make this again.

For Thanksgiving I'm going to add both chopped kale and zucchini squash to my stuffing. It cuts down on the carbohydrates, adds good flavor and gives a healthy boost to an otherwise bready stuffing. Click here to see my kale soup recipe (it's actually not mine, I learned it from Jim & Robbins Hail at Bear Creek Farm). It is outstanding and really easy, too. Here's kale to your good health.
Happy Thanksgiving!

Oh, and if you want the best pumpkin pie recipe, and our special seasoning, click here. Anne's Pumpkin Pie Seasoning is the best flavored seasoning we've ever found, and Anne gave us her very special pumpkin pie recipe - much better than that recipe on the side of the pumpkin pie can!

10/31/2013

Squash Frittata, Beet Cake

Dennis, Betty, Josh and Art (checking  his email).
A newspaper editor came to the garden this summer for an interview. He asked me why I garden. "You've been doing this every year for most of your life, so don't you get tired of doing the same thing over and over?" I tried to explain no two seasons are ever the same, every year is a new challenge and every year I try new varieties, different vegetables and herbs. Not being a gardener, I don't think he ever quite understood. But the primary reason I garden is what you see above, getting to share what I grow and produce with good friends over pleasant meals. These folks are all friends from Hawaii, we always look forward to their visits and they love good food, so cooking from the garden is always a pleasure.
Fresh from the garden, directly to the kitchen.
Betty especially likes beets, fixed any way they can be fixed, so we had steamed beet greens with balsamic vinegar, buttered beets with orange juice and a beet cake (along with grilled salmon, and a squash fritta).

Frittata, grilled salmon, beet greens and beets, not especially pretty, but tasted good.
Here's the frittata recipe.
Squash Frittata
  • 3 tablespoons olive oil
  • 1/2 teaspoon grated fresh ginger
  • 1 small yellow onion, thinly sliced
  • 2 cloves garlic, chopped
  • 1/2 teaspoon ground turmeric
  • 2-3 medium zucchini (or young patty pan squash), in 1/4 inch slices
  • 2 tablespoons flour
  • 1/4 teaspoon baking soda
  • 4 eggs, beaten
Preheat oven to 375 degrees F.
Heat oil in a saucepan. Add onion and garlic and saute until soft. Add turmeric and zucchini, add a dash of salt and pepper and cook until tender, about 10 minutes. Stir in flour and baking soda and cool briefly.
Mix in the beaten eggs with the zucchini and pour into a greased 9" x 13" casserole pan and bake until set, about 25 minutes. Let cool for 5 minutes before cutting into serving sizes.
Apple pie - how did the crust get that way??

Beet cake. A leaf and powdered sugar created the design on the cake.
 For dessert we had either beet cake or apple pie so of course everyone had a small piece of each one. Here's the beet cake recipe, not mine, I was given the recipe by herb friends at Round Top, TX and I've made some adjustments to it over the years.
Beet Cake
  • 1 15 oz. can of beets (not pickled, just plain, canned beets)
  • 1 1/2 cups flour (I use 1 cup unbleached flour and 1/2 cup whole wheat flour)
  • 2/3 cup vegetable oil
  • 3 eggs, beaten
  • 2 cups sugar (I use 1 1/2 cups granulated stevia or Truvia and 1/2 cup sugar)
  • 2 teaspoons cinnamon
  • 2 teaspoons dry ginger
  • 2 tablespoons freshly grated fresh ginger
  • 2 teaspoons baking soda
  • 1/2 teaspoon salt
  • 1 cup nuts, chopped (I used pecans or walnuts)
  • 3/4 cup coconut
Heat oven to 350 degrees F.
In a food processor, empty the entire can of beets, juice and all. Blend it well. Combine the rest of the ingredients except for the chopped nuts, mixing well. Fold in the chopped nuts and coconut. Pour into a 9 x 13, oiled and floured baking pan (or 2 round cake pans). Bake until a knife inserted comes out clean, about 25-30 minutes. Let cool. Serve with real whipped cream. Or, if using 2 round cake pans, use this filling between the layers:

Cream Cheese Filling
  • 1 (3 ounce) package cream cheese, softened
  • 1/3 cup butter, softened
  • 4 cups powdered sugar
  • 1 teaspoon vanilla extract
  • 2 tablespoons milk
In a medium bowl, blend the cream cheese, butter. Gradually mix in the powdered sugar, vanilla and milk, mixing well. Spread on bottom layer of cake, then add the top layer. Let set up for an hour or so before serving. The cake can be made ahead and frozen, then thawed before serving.

Beet cake doesn't need frosting, just some real whipped cream on top.
 

9/30/2013

Outstanding Green Tomato Pickles

Ozarks Gardening
Copyright 2013, Jim Long

Green Tomato Pickles

We’re at the end of the tomato growing season with lots of green tomatoes on hand.  There are several choices about what to do with the tomatoes before cold weather arrives.

You could wrap them individually with newspaper and put them in a box where they’ll ripen slowly over the next few months. A drawback to this method is you have to unwrap every tomato to see if it’s ripening. You could use my method and leave them on the windowsill over the sink, unwrapped, where they will ripen slowly and provide tomatoes right up to the Holidays. Or, you could make a batch or two of fish house green tomato pickles. Here’s my recipe, it’s easy, quick and provides a batch of outstanding green tomato pickles.
Quartered tomatoes.

Fish House Green Tomato Pickles

2 quarts quartered green tomatoes
2 large onions, chopped or sliced
1/3 cup chopped hot peppers
1/3 cup chopped sweet red bell peppers
1 3/4 cups sugar
2 1/2 tablespoons salt
3 cups white vinegar
1 teaspoon celery seed
1/4 teaspoon yellow mustard seed

Combine ingredients in a large cooking pan and bring to a boil. Let simmer for about 5 minutes. Ladle into hot, sterile jars, wipe lip edge of jars, screw on hot, new jar rings and flats and finger-tighten. Place jars into a boiling water bath, with at least 1 inch of water above the jar lids. Bring to a boil and keep slowly boiling for 15 minutes (for pints, 10 minutes for half-pints; if you are above 1,000 ft. elevation, increase processing time accordingly). Remove and cool on a towel. Don't tinker with the lids, they will seal in 30 minutes or so. Let cool overnight then label and store in the pantry. These are best after the flavors have matured, about 2 weeks or more, and will keep for one to two years in the pantry.
Fish House Green Tomato Pickles, ready for winter.

8/26/2013

Salsa for Canning

Ozarks Gardening
Copyright 2013, Jim Long


Canning Salsa

This week I’ve been canning salsa. Like nearly every other gardener I’ve talked to this summer, I’ve had a lot of split and damaged tomatoes from the earlier rains. I don’t want to waste the tomatoes so I cut out the damage and turn the good parts into salsa. Over the years I’ve tried a lot of canned salsa recipes and this one has become my favorite. Using 2 jalapenos gives a mild sauce, 4 makes a medium and for a hotter sauce, use 5-6 jalapenos.

8 cups, peeled and quartered tomatoes
1 large yellow onion, sliced
8-10 cloves garlic, peeled
2-4 jalapeno peppers, seeded and sliced
1/2 cup fresh cilantro, chopped
1 tablespoon salt
3/4 cup apple cider vinegar
1/4 cup fresh lime juice

Combine the ingredients in a food processor and coarsely chop everything. Pour that into a cooking pot and bring to a simmer, about 10 minutes. Pour hot salsa into hot pint jars, leaving about 1/2 inch headspace. Seal jars with two-piece lids and process in boiling water for 15 minutes. Makes 4-5 pints.


If you want a simple fresh salsa, you might like this one.
Basic Fresh Salsa

3-4 medium sized tomatoes, chopped (about 3 cups)
4-5 green onions, chopped
1/2 cup red or yellow bell pepper, diced
Juice of 1 lime
3 tablespoons freshly-chopped cilantro
1/2 (or 1 whole for hotter) jalapeno, seeded and diced fine
2 garlic cloves, diced
1/2 teaspoon salt

Combine ingredients and refrigerate for an hour before serving with chips.

Visit my website to see my books which have lots more of my recipes and gardening information. Happy gardening!

8/06/2013

Perfect Sweet Pickles

Copyright.Jim Long.2013

This has been a good cucumber-growing year. I make these pickles every 2 or 3 years, a necessary ingredient in tuna salad, potato salad and deviled eggs. It’s a recipe that’s been in my family at least 4 generations. It's my Grandma Harper's Sweet Pickle recipe.

8-12 medium-sized cucumbers (about 8 inches long)
Wash cucumbers and be sure to cut off the blossom end; it contains an enzyme that may cause the pickles to become soft. Cut it off and discard about 1/4 inch of the blossom end.
Be sure to cut off the blossom end.

Place washed cucumbers in a stone jar (or stainless or enamel pan) large enough to hold the cucumbers submerged in water. Bring enough water to cover the cukes, to a boil, and pour that over the cucumbers, covering completely. Put a plate on the cucumbers to weight it down to hold the cucumbers under the water.
Cucumbers, ready for plate to hold them down.

The following day, pour off the water, bring fresh water to boil and cover the cucumbers again, also weighing down to hold them under the water. Repeat this process of drain, rinse and pour boiling water, for 4 successive mornings).
Cut-up cukes, ready for vinegar mixture.

On the 5th day, drain off the water and rinse the cucumbers. Rinse out the container, too. Cut the cucumbers into slices or chunks and put those back into the container. Over that pour the following:

8 cups sugar
4 cups apple cider vinegar
5 tablespoons pickling salt (not table salt)
2 tablespoons mixed pickling spices, available at the grocery store

Bring this mixture to a boil, stirring until the sugar is dissolved. Pour this boiling mixture over the cut-up cucumbers in the container, replace the plate to hold the pickles down in the mixture. Leave this for 2 to 4 days before you can them. Process in a boiling water bath. (Consult the Ball Blue Book for processing times based on size of jars you’re using).

Visit my garden blog, as well, for more stories and recipes: http://jimlongsgarden.blogspot.com
The finished sweet pickles, ready for the pantry. They'll keep 3-4 years easily.

2/11/2013

Kale Soup


I learned about kale soup from Jim and Robbins Hail at Bear Creek Farm. Since kale is good for us - lots of antioxidants, vitamins, minerals, etc., they had been trying to eat more. I've only recently come to like kale and this recipe is outstanding, I think. It freezes well, too, just leave out the milk or cream and add it after you thaw out the soup.


Kale Soup
Half a paper grocery sack full of fresh kale leaves
4 garlic cloves, peeled
1 medium yellow onion, sliced or diced
1 cup half and half
2 cups whole or reduced fat milk
Chicken broth
Salt and Pepper to taste
2 teaspoons Tabasco or favorite hot sauce
1 tablespoon olive oil

1 - Heat the olive oil in a small pan. Add the onion and garlic and saute until just barely tender. Set aside.

2 - Fill a medium to large stockpot about half full of water and bring to a boil. Add the kale leaves and simmer for about 10 minutes. Drain, reserving some of the water.

3 - Working in batches, puree the kale, garlic and onion, along with some of the reserved water until smooth. Pour back into the stockpot.

4 - Add 4 cups chicken broth, along with the milk and half and half. Bring to a slow simmer.
5 - Add the hot sauce and salt and pepper to taste.

Serve with a bit of real cream, or just as it is. This makes a delicious soup for winter or summer. This makes about a half gallon of soup.

For my Kale Casserole recipe, click here.

1/22/2013

Elderberry Recipes

Elderberry Syrup
1 1/2 cups freshly-picked berries (or substitute 3/4 cup dried organic berries)
3 1/4 cups water
1 1/4 cups honey - raw, local honey if available
1 3-inch cinnamon stick
3-4 whole cloves
1 large piece candied ginger (or substitute 1 teaspoon grated fresh ginger)

1 - Combine everything but the honey and bring the mixture to a boil. Reduce heat and slowly simmer for about 25 minutes.
2 - Using a potato masher, crush the berries and set aside to cool for several hours.
3 - Strain, discarding solids, then add the honey and mix to dissolve.
This makes approximately 4 cups of syrup and can be stored in the refrigerator for about 8 weeks. This can also be frozen in ice cube trays for longer storage and taken out as needed.

Elderberry tincture from the store is made with alcohol, which is the accepted method of preserving most tinctures. You can also make a non-alcohol based tincture using this recipe.

Elderberry Tincture with Glycerin

Vegetable glycerin is available at many health foods stores.

1 cup vegetable glycerin
1 cup water
1/2 pound dried elderberries

1 - Place the dried elderberries in a quart glass jar and pour the glycerin over the berries. Place a lid on the jar and keep it in a cool, dark place such as the pantry for 6 weeks. Gently shake the jar daily to keep the berries from settling.
2 - Strain the mixture through a colander or cheesecloth, squeezing out all of the liquid from the berries. This can be stored in the pantry in an air-tight container, or in the refrigerator, for 5-6 months. It makes about 2 cups. Most people use 4 teaspoons daily at the first signs of cold or flu.

Sources
Plants:
Pense Nursery
Mountainburg, AR
pensefarms@centurytel.net
pensenursery.net; (479) 369-2494

Elderberry Varieties from Cuttings:
River Hills Harvest,
Hartville, MO
Terry Durham (573) 999-3034
riverhillsharvest.com

Dried elderberries:
Mountain Rose Herbs; mountainroseherbs.com
Horizon Herbs; horizonherbs.com

Elder Cream Organic Skin Salve
Evening Shade Farm, Osceola, MO
Cindy Parker: (417) 282-6985
eveningshadefarms.com

1/07/2013

Rosemary Chocolate Chip Cookies

The kids gave me a personalized stool, with Renee's Seed packets on top.
If you've been following my blog, you know I'm a fan of kids garden projects, and I've been working with one in particular, the Health, Wellness and Environmental Studies Elementary Gardens, in Jonesboro, Arkansas. If you use the Search button on this blog, and look under "school garden," you will find previous stories and photos. (You can help this school by visiting my website and clicking on the button, "Buy Seeds, Help Kids.") Renee Shepherd at Reneesgarden.com is generously donating 25 cents of every dollar you spend buying seed, to this remarkable school. Click here for details, or from my home page of my website. This week I drove to the school for the honor of doing 2 classes with the kids, one with the  4th grade, one with the 5th grade. (You can also follow the school on FaceBook, just look for HWES school on FB search; they'd appreciate it if you "Like" them).
Boys making tortilla chips with chili powder.
The goal was to teach the kids how to use some of the herbs from their school garden. They'd picked rosemary for the cookies, chives and mint for the salsa, and one of their hens had provided eggs. The tortilla chips are simple: spray tortillas with a tiny bit of oil, sprinkle with chili powder, cut in strips and bake until crisp.
Ingredients from the school garden.
I can't talk without using my hands and we were discussing something really important but I don't remember what it was. While the kids worked on snipping and cutting and prepping, I mixed the cookie dough. Our cookies for the day were Rosemary-Orange Chocolate Chip.

You may not realize it but children's taste buds aren't fully developed like adults, so the taste of something like rosemary isn't something kids are drawn to. Kids primarily can taste sweet, sour, salty and bitter until they're in their teens or later. But if you introduce them to a flavor like rosemary, with another flavor with it - chocolate for instance, it is more pleasant for their tastes. So each of the children tasted a chocolate chip with a rosemary leaf

That's Melinda Smith, below, who teaches, organizes and oversees the garden, writes grants and everything else to keep the garden going and teachers involved.


Melinda demonstrating the safe use of knives.
These girls squeezed lots of lime juice for the Green Grape Salsa.
Once we had all the ingredients - green seedless grapes, lime juice, poblano pepper, mint, chives and diced green onion, I whirred it up in my handy little salsa maker.

The tortilla chips came out of the oven in time for the kids to all taste the Green Grape Salsa (from my book, Salsas, from Apple to Zucchini). Almost every child liked the salsa (and we made enough to take to the Craighead County Master Gardeners where I spoke that evening).

A favorable review from one of the 5th graders.
Recipe for Rosemary-Orange Chocolate Chip Cookies

2 sticks (1/2 cup) butter, softened
1 teaspoon baking soda
1 teaspoon salt
2 1/4 cups flour
3/4 cup granulated sugar
3/4 cup packed brown sugar
1 teaspoon vanilla extract
2 eggs
2 cups semi-sweet chocolate chips
2 teaspoons chopped fresh rosemary
Grated peel from 1 orange

Preheat oven to 375 degrees F.
1 - Mix flour, baking soda and salt in small bowl and set aside
2 - Beat butter, granulated sugar, brown sugar and vanilla in large mixer bowl until creamy.
3 - Add eggs and beat.
4 - Add flour mixture, stirring well.
5 - Stir in chocolate pieces, rosemary and orange peel.
6 - Drop by rounded tablespoon onto baking sheets.
7 - Bake for 9 to 11 minutes or until golden brown. Cool on baking sheets for 2 minutes; remove to wire racks to cool completely.
Rosemary-Orange Chocolate Chip Cookies ready to bake.
It's fascinating to see kids excited about learning. This is a remarkable school, with some of the most creative and amazing teachers. Every trip I make to the school, 12 hours round trip, I come back saying if school had been that way when I was a kid, I would have loved school!
Great helpers, it was a fun day.